Samsung WB150F review: The Wi-Fi Point-and-Shoot
Social Sharing and Email
Say you just took a gaggle of fun pictures with the WB150F and you want to upload them to
. In order to do that, you have to be within range of a Wi-Fi network for the camera to connect. Once it does, the WB150F will display a login screen for entering a username and password. The downside is that I had to use the camera's four-way directional pad to enter the information, which was time consuming and frustrating. I remember NES passwords that took less time to enter.
Once you're logged in, the camera allows you to check off which pictures and videos you want to upload before clogging up the bandwidth. Emailing an image to someone was the same process, only I had to enter my email information and the recipient's email address. Did it work? Yes. But it was a pain in the ass.
MobileLink
One of the Samsung WB150F's key Wi-Fi features is its ability to connect to other Samsung devices like smartphones and tablets and transfer over pictures and videos. This process was a bit trickier, as I had to download the MobileLink application to my phone. Then I had to open the MobileLink option on the camera, connect the phone to the camera's Wi-Fi network, open up the MobileLink application on the phone, and then I could finally transfer images and videos wirelessly to the Galaxy S II.
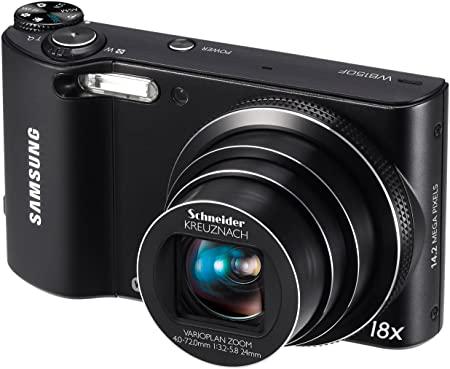
This was another time-consuming endeavor, which led me to think, "Why wouldn't I just take pictures with the phone in order to avoid all of this in the first place?" For one, the WB150F has that nice 18x optical zoom lens. And lots of manual controls and fun filters. But even then, it would take me far less time to toss those images and videos onto my computer and up to a social networking site than it would to go through the American Gladiators obstacle course necessary to transfer the media to a phone from the camera.
Remote Viewfinder
One of the features I was most excited about was the Remote Viewfinder option, which basically turned the Galaxy S II into a remote viewfinder for the WB150
F. In order to make this happen, I had to download The Remote Viewfinder application on the Galaxy S II, connect the phone to the camera via Wi-Fi, then run the Remote Viewfinder application. After a bit of time, the phone finally linked up to the camera and displayed an actual remote viewfinder, which was awesome. The good news is that I didn't have to be in range of Wi-Fi to make this happen, since both devices were feeding off of each other.I turned the phone to the horizontal position, thinking the remote LCD on the phone would orient itself horizontally, but to my chagrin, it remained in the vertical position, maintaining its diminutive resolution. So, expect a much smaller remote viewfinder than you hoped for. Regardless, this was my favorite Wi-Fi mode because the image could be captured from the phone by pressing a virtual shutter button, and it saves to both the camera and the phone. Unfortunately, there's a bit of lag between pressing the shutter button and having the image captured, so don't expect and instant snap.
The Rest
The Samsung WB150F could also connect to Microsoft SkyDrive via a Microsoft Live account in order to store images and videos in the cloud. I did it and it worked. However, only Microsoft SkyDrive is supported, so that's something to consider. The WB150F could also be connected to a Wi-Fi enabled TV in order to view images and videos cable-free. The downside to this was the time it took to connect to a TV and the mediocre quality of the images and videos when they were viewed on the big screen. An HDMI cable would have shaved valuable time off the whole process.
The Conclusion
While some people may find the Wi-Fi features to be beneficial, I didn't have any use for them. Sure, the Remote Viewfinder was cool, but when am I really going to use it? Any images or videos I upload to the internet or save to my computer are done quickly via USB cable. Plus, I still think most people will rely on their smartphones to take pictures rather than a smart camera.
Samsung WB150F Image Quality
Next: Oculus Quest 2 Review
